Saturday, September 18, 2010

DAY THIRTY!!!!!!!!!!! (pictures)

HEY YOU GUYS! It's finally day thirty! (I guess in reality it's day fifty-something, but who's counting?) Today is another picture edit day.


I started with this, and then I wished it had more colour, so I did the magical saturation thing again.


I really like it! I'm not sure how it looks on my computer versus how it looks on your computer, but to me it looks wonderful. (I learned that computer screens can drastically affect how a picture looks.)

Anyway. That's it. No big bang or anything.

Overall Highlights: being creative, making magnets, having a few inspired novel-writing days, whiteboard, and bookmarks.

Overall Lowlights: stupid japanese papercraft boxes, stupid menswear bunny, stupid laptop bag, losing inspiration for my novel, resorting to Ikea picture frames, and not actually completing this challenge within the desired timeframe.

Friday, September 17, 2010

Day Twenty-Nine: fairy land!

Hey guys! Look! Two days in a row!

This is what I did today. My bedroom initially looked like this.


A few years ago I went to my cousin's house nearby to Christmas, and she had taken silver tree balls and tied fishing wire to them and then stuck them in the ceiling, so the whole place looked like a fairy land! I loved that room. I would lie on the floor and gaze at the ceiling. When I got home, I bought some tiny purple tree balls and some fishing wire, but then I didn't do anything with them because I am lazy.

But then I did this!


Turns out I didn't get enough for my whole room.


When I lie in my bed at night this is what I gaze at:


I promise you it looks better than these pictures. I am so excited!

Day Twenty-Nine Highlights: now I live in a fairy land.

Day Twenty-Nine Lowlights: waiting so long to do this, not having enough to do my whole room.

Tomorrow: probably some other pictures of my new hometown!

Thursday, September 16, 2010

Day Twenty-Eight: pictures

Hey guys! It's totally the next day after my last post. I am super good at completing the goals I set out for myself, and thirty days is a completely manageable time frame in which to complete something!

Ahem. Excuse #1: I moved and started a new job. Excuse #2: I only got a camera yesterday. And here's what I did with it!

This is outside my classroom. I have the best view in the entire world.


Then I used Picasa from Google to make it more blue and also increased the saturation. From what I can tell, increasing the saturation makes the colours stand out more. (Don't quote me on that. I don't know anything about photography or free programs you can download to edit your pictures. Mostly I'm just like, "Hm, I'll slide around this little knobby and see how it makes my picture different!")


Then I decided that I didn't really like the playground on the side, or the apartment buildings, so I cropped it.


And there it is. I don't know - I was all super keen to get a camera so I could take pictures of how beautiful it is here, but I quickly came to realize that if you don't have a lot of money to spend on a camera, what you see and what you capture on digital film is not the same. Oh well, at least I was creative! Yay, me!

Day Twenty-Eight Highlights: finally taking pictures of my spectacular view.

Day Twenty-Eight Lowlights: figuring out photo editing programs, trying to compress pictures, lacking follow-through.

Tomorrow: more pictures, probably! I might just take a bunch tomorrow and the pretend it was spread out over a few days, since I thought that this post would be day twenty-nine. WILL THIS NEVER END.

Saturday, August 21, 2010

Day Twenty-Seven: pictures

I don't know if you've noticed, but I appear to be taking this "every day" thing pretty loosely right now. I keep forgetting to be creative, and then sometimes realizing I was indeed creative after all accidentally, and sometimes not. I remembered that when I was in Whistler I really wanted to make soap, so I am going to investigate how to do so and maybe churn out something genuinely creative in the next three days... we'll see.

Anyway. For today, I have some pictures that I took! I have all these friends who are super good at taking pictures and are making businesses out of it, but don't go expecting anything Polly Photographer about these ones. My parents and I were in Sechelt for the day, and my dad was gallivanting around the rocks with my dog and I was left with the camera for safekeeping. It's a lot more fun to take pictures with a giant camera that makes the old-fashioned click-click sound when you press the button, so I took a bunch of pictures because I liked the sound. These ones are the best.


This one is my favourite. There were arbutus trees everywhere, and I love arbutus trees. They are so smooth! Plus I learned from an informational sign that sometimes arbutus trees look just like regular trees with rough bark, and then they shed their winter skin and become smooth and awesome. Like ninja snake trees!


These are arbutus trees mid-shed. Camouflage bark is gone, next step: peel.


There were a million purple starfish everywhere!


The ocean was so sparkly.

Day Twenty-Seven Highlights: cameras that sound old, arbutus trees.

Day Twenty-Seven Lowlights: nothing, really. It was pretty awesome.

Tomorrow: soap? I don't know. I'll try, though - I promise.

Tuesday, August 17, 2010

Day Twenty-Six: Ikea picture frames (sigh) - updated

I thought today was day twenty-seven, and that I would only have two days left. But then I discovered that in fact, it is day twenty-six only. WILL THIS NEVER END. Discovery: I don't like doing things for thirty days. Especially when it's hot outside and I'm moving.

Anyway. I don't want to buy any more stuff, so I'm down to using what little I have left in my craft box. Today this meant painting Ikea picture frames. I have a bunch of pictures that I want to put up in my new apartment, with the picture frames painted to correspond - I'm sure it will look neat when it's all put together, but I forgot to order the pictures until just now so you can't see it put together until at least tomorrow. So for now it's pretty uninteresting.

Materials:
- frames
- paint
- paint brush

I learned that I really enjoy mixing primary colours together to make other colours. It's like an adventure! You have to be a colour detective. "Is teal more blue or more yellow than olive green? How many drops of red are allowed until it all turns brown?" It's very exciting. Except that I didn't end up making teal at all. I did it once before, when I painted that frame for my white board, but my directions for colour use weren't technical enough that I could re-create it.

This is what I started with:


And this is what I have now:


I'm fairly certain that I don't need to outline the process.

I have a vision for these frames and a mirror in my long front hallway. I'm sure it will look great. You can come visit, and decide for yourself!

Day Twenty-Six Highlights: being a paint detective.

Day Twenty-Six Lowlights: I'm pretty sure this barely constitutes a craft. That's a lowlight. Also, not being able to make teal.

Tomorrow: who knows. Who the heck knows.

UPDATED with the pictures inside them:


It does look better. Oh good.

Sunday, August 15, 2010

Day Twenty-Five: shiny rocks

So... it was really hot yesterday. Basically all I did was sit on the couch in my air-conditioned living room with a fan fixed on me eating watermelon and reading. (I was eating the watermelon and reading, the fan was not.) Which sounds like a nice day, I think, except when you consider that I was being air-conditioned and fanned and still had gross sweat drops coming off my face.

Anyway. The moral of the story is that it was too hot to do anything yesterday. Except that I was accidentally creative! Mother and I went to the beach early in the morning, and collected rocks for the vases we both bought, and I like shiny rocks so I sprayed them with varnish. This morning I peeled them off the newspaper I varnish-glued them to, and realized that I think that counts as being creative. The varnish I used totally has a picture of crafts on it. I didn't take any pictures of the process, because I only realized my brilliance this morning. (This morning being Monday, but since the creativity happened on Sunday that is when the publish time of this post is. Ooooooh tricky internet.)


I still haven't remembered what the awesome thing I was going to do is, as I mentioned on day twenty-four, so I don't really know what I'm going to do today. Probably going to put it off for as long as possible and then work on my scarf. I'm fading, you guys. No more sewing machine stuff, even though I have some fabulous material and I still haven't built my reversible purse. In all honesty I think I will be decorating Ikea frames to put in my apartment. I KNOW. IKEA FRAMES. Welcome to Arts and Crafts for children.

Saturday, August 14, 2010

Day Twenty-Four: fridge pen holder

I'm all about accessorizing my fridge right now. My project for today sprang from the mind of not martha, but she used a Starbucks gum container and I am not made of money, so I searched high and low for something similar. The funny thing about this craft stuff is much of what I find is how to recycle old or broken things, but I don't have any of those old or broken things so I have to break nice things or buy things that I can recycle. I wish I was more of a hoarder so I could just sift through my miscellaneous belongings to find the materials I need, instead of going on hunts and buying stuff.

Anyway.

Materials:
- Methos gum container
- magnets
- scrapbooking paper
- liquid glue
- scotch tape

I was about to use a tic tac container (they make giant ones all of a sudden!) and then found a good-sized Menthos gum container that was cheaper.


First I discarded all the gum in the container (I don't really care for gum), peeled off the stickers, and took the lid off. The stickers left nice residue that made it easy to stick the paper on - I used damask again, which shouldn't come as a surprise to anyone. The thing about the one at not martha is that the tin case is easier to paint and put tissue on - I thought I could just wrap paper around the case and be done with it, but the top was gape-y and the green plastic was visible. So I got liquid glue all over my fingers and smeared it over the paper like paper-mache for the top, and then glued the paper on regular for the rest.

top
rest

That was easy enough. Then I glued two magnets on the back, leaving room for a third in case pens were heavier than I anticipated, and waited for the glue to dry. WAITED. Luckily, it's vacuuming day so I was kept busy for a while.


 Then I stuck it to the fridge with two pens inside to test the weight, and voila:


My fridge is the luckiest fridge of all, you guys. It's so pretty right now.

I was going to make a corresponding paper-holder, but it suddenly got a million degrees hotter and I can't focus on anything new. That might be my project for tomorrow.

Day Twenty-Four Highlights: peeling dried glue off fingers, magnets, damask paper.

Day Twenty-Four Lowlights: waiting for glue to dry, gum.

Tomorrow: the corresponding paper-holder, or else there was something else that I wanted to do but it's so hot that I forget right now. Probably it was something awesome, so you should stay tuned.

Friday, August 13, 2010

Day Twenty-Three: ribbon frame

So these past three days I've been moving all my stuff to my new apartment, and I spent the majority of one afternoon washing all my dishes before I put them in cupboards. I don't have a dishwasher, but I do have a double-sink, so it was okay. However, there is a boring, empty expanse of wall above the sinks that I stared at the whole time, so I decided that I should make something to put there. My first thought was a mirror, because that's easy, but then I immediately nixed that for being too narcissistic, plus I might give myself a heart attack every once in a while. My mom suggested a bulletin board, which I then amended to one of those frames with the ribbon that you stick pictures and notes in. (I half-heartedly googled "ribbon frame" to find out the real name, but Google didn't know what I meant. The pictures will tell you what I mean. You've seen them before.)

Materials:
- largeish frame (Ikea)
- material (Value Village)
- ribbon (Precious Memories)
- thumbtacks (from my picture-hanging kit)
- good quality stapler
- needle-nosed pliers (optional)
- strong adhesive (optional)

I was excited about this project because I have a plethora of Ikea picture frames, but my taste is evolving in the way that I like my pictures to be in more interesting-looking frames, so I've got all these boring frames lying around. My first step was to remove the plastic from the frame, leaving only the frame itself and the cardboard backing.


Then I stretched fabric across it and stapled it to the frame. (I'm not sure if stapling was the best way to go about doing this, but I didn't consult any websites for advice since I can't remember what it's called, and a stapler was all I had.)


This was the only step which caused me any real trouble. I broke a nail pulling out a staple, wasted a lot of staples by not pushing hard enough, and broke my stapler for a bit. (I smashed it against the table a couple of times to fix it, and it worked! That never works!) My fingers look super weird in that picture, but that's because I had to push REALLY hard on the stapler to get anything to happen.


You have to do some fancy folding around the corners to keep the fabric tight, but I think it all worked pretty well. Then I got my ribbon, and stapled that to the outside edges of the frame.


Before I even began this thing I was worried I didn't have enough ribbon, and I ran out when I was 3/4 of the way finished. I had similar ribbon, but not identical, so two of the strands are more brownish than the others - I'm not sure if it looks okay, but I didn't want to go out and buy more ribbon. Also, I had to do some re-positioning on some after I'd finished them all, because I didn't measure or anything. Probably it would look better if you did, but I just made sure they were all perpendicular to each other.


Then I stabbed thumbtacks at each crossing point so they punctured the cardboard. My secret wish was that the cardboard would be enough to hold them in place, but some of them came popping off so I rooted through my dad's toolbox and found needlenosed pliers. With these I bent the backs of the thumbtacks to keep them from popping out. In the process I punched some holes in the back of the cardboard, so the thumbtacks popped out with their bent backs, so I found some Gorilla Glue in the laundry room and put some of that on the back of each thumbtack. (The instructions for the glue say you're supposed to dampen each thing you want to stick together, which I didn't, and then clamp it, which I also didn't. I also neglected to wear gloves, which you are supposed to, and I think I got some on my skin. Hopefully everything still works even though I blatantly disregarded every single instruction on the bottle.)


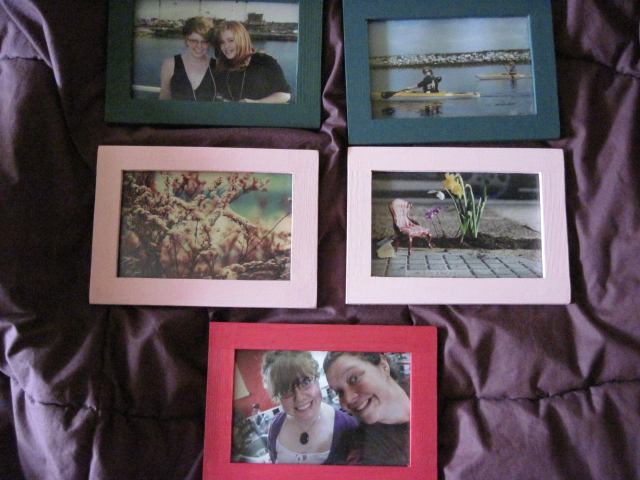
Then I waited for a million years for the glue to dry, which it did eventually, and then I stuck stuff in the ribbons, and now I am finished! I think I will also stick some small sewing pins on it to let me stick more stuff in it than just in the ribbons, because I want to cram it full of stuff.


I am so proud of this! I did it without even a plan in mind, or knowing what it was called! Sometimes I am so amazing.

Day Twenty-Three Highlights: coming up with a brilliant plan and succeeding, fixing things by smashing them, double-sinks.

Day Twenty-Three Lowlights: getting Gorilla Glue on my hands, waiting for things to dry, thumbtacks that pop out, running out of ribbon.

Tomorrow: I bought a pack of Menthos gum specifically so I could use the package for a pen holder to stick on my fridge, so probably I will make that tomorrow. If I can find somewhere to stick all the gum.

Monday, August 9, 2010

[PAUSE]

Hey guys, I'm going to be on pause for a few days, as I am moving to Campbell River. I'll be back probably on Friday or something, be home for a week or two, and then move for real to stay. I'm not sure if decorating an apartment counts as being creative? Regardless, I will take pictures and post them and maybe they will count.

Sunday, August 8, 2010

Day Twenty-Two: glove squirrel

For some reason the needle I found in my sewing box was larger and less sticky than the one I put back in my sewing box last night. It still stabbed me a bunch of times, though.

I began by stuffing the pieces (minus the ears) with stuffing. This made them look better, I'm pleased to say, a little more uniform. I didn't notice until the end product that I stuffed one arm more fully than the other, so my squirrel kind of looks like that dude from that KFC commercial who has one GIANT arm and one puny arm. I mention this now instead of at the end so that you will know to be careful with how much you stuff.


Then I sewed the arms and tail shut and attached them on. When I got to the part about the head in the original instructions, they gave me a fancy way of sewing it shut so that it looked nice, and I think they should have mentioned that at the beginning. Why wouldn't you want the arms and tail to look as nice as the head? I don't know. Anyway, I will tell you the trick: fold the left side in, the right side in, the top side on top of those sides, and then finally the last side and sew it shut! It keeps all the fraying edges neat and tucked away.


But I got a bit ahead of myself. Before I did the head, I closed up the arms and tail and then attached them to the body in a haphazard manner. I'm still not sure how people can sew on extra pieces without the seams showing like Frankenstein. Tips?


Then I did the head, closing it up with the fancy instructions like they told me to. The ears were the easiest thing about this whole project. All you do is fold them in half and sew the bottom together, and that makes it look like a real squirrel ear, and then attach that to the head.


Then I sewed the head to the body, but I think I did it a little bit incorrectly because he doesn't have a neck and he looks a bit snobby.


The instructions called for a wood button, but I found a nice non-wood button in my sewing box, so I attached that. Then I was supposed to use embroidery thread for the eyes, I think because it's thicker, but I didn't have any so I just used regular black thread.


My mom thinks he's cute.

Day Twenty-Two Highlights: completing yet another project, his face, finding mysteriously improved needles.

Day Twenty-Two Lowlights: never being as good as the example, getting stabbed by a needle, snobby squirrels.

Tomorrow: I have no aspirations for tomorrow. We'll see what happens.

Saturday, August 7, 2010

Day Twenty-One: glove squirrel - updated with pictures

This is going to be an unfinished post, partly because my craft is unfinished and also partly because I didn't download the pictures onto my computer yet. I was about to, then I accidentally knocked a bunch of stuff off my desk, and then was too grumpy to do anything except go to bed. I will write the post in part today, and then update it with pictures and stuff tomorrow.

I am making this: a recycled glove squirrel. Except that my glove is red, not brown, and it's not a glove who lost its partner. I am stealing a glove from its partner because I want to make this craft.

Materials:
- glove
- stuffing
- thread
- button
- the instructions say pipecleaners, but I have gotten that far and do not need them. So you can decide.

I used the guideline on that website to chop up my glove. A note: chopping up a glove makes a lot of little glove fluff bits to fly everywhere. Maybe wear some kind of oxygen mask and goggles to protect yourself from fluff bit inhalation. (Learn from my mistakes, people. The overarching theme of this blog.)


Then I hand sewed the edges together to create the legs/body, head, and arms. Of course, of COURSE mine are deformed, and look nothing like the ones in the example. Mostly just the legs, but still; I don't understand why that always happens. The hand sewing was difficult because the needle is still sticky from when I sewed that self-adhesive velcro onto my laptop bag, and also the needle was feeling extra stabby today. I got myself a couple of times pretty deep. (That is another reason why this project is unfinished today. I grew to detest the needle, so I needed to take a full-night's-sleep-length chill break.)


At this point I have the bits sewed, but not stuffed. That will be my next step! I'm sure I can handle that.

Day Twenty-One Highlights: squirrels.

Day Twenty-One Lowlights: sticky, stabby needles; knocking stuff over.

Tomorrow: pictures of today's work, and hopefully completion of glove squirrel!

Friday, August 6, 2010

Day Twenty: laptop bag

You guys!!!!!! I totally finished the stupid laptop bag today!!!!! I'll admit, I wasn't going to. But I didn't have work or anything today, and I figured it would take me a lot of time to finish, so today would be a good day. So I dragged out the sewing machine and the unfinished laptop bag and set to work. For materials, see here.

First, I made sure that the material hadn't shrunken and my laptop hadn't grown by sizing them up together again. (One of the major problems with my first attempt was that the bag ended up being too small, so I went the opposite way here and made it really large.)


Then I hand-sewed the corners of the soft stuff to the fabric to anchor them. (Another problem I had originally was that I made the soft stuff and the material the same size, so the whole thing was lined - I realized that only the part covering the laptop needed to have the soft stuff in it, not the seams or the lid flap.)

Then I folded it over and pinned the sides (another lesson learned: USE PINS FOR EVERYTHING), then sewed the edges using a sewing machine. I did this a few times, because after I sewed it the first time I realized that it was too big.


I wanted it to be snug around my laptop, not loose. I folded, sewed, and cut a few times to make it fit properly.


At this point, I turned it all right-side out like you are supposed to, and unfortunately it looked like crap because of a bunch of other stuff that was going on. So I turned it inside out again, and decided that the seams showing was going to be an artistic statement! I am starting a new trend here, people, like visible zippers. I bet that was a mistake too! Some designer finished the dress and realized, "Oh crap! The zipper is showing!" but they were on a deadline, so they said, "I'm starting a new trend! Visible zippers!" That's how these things start. (Although I don't like visible zippers.)

Then I added velcro to the lid flap with my sewing machine, only it was the crappiest velcro of all time. It's supposed to be self-adhesive, which I didn't realize until after I sewed on the first two velcroes, so I sewed on the removable strip along with the rest of the velcro. Whoops. Then I hand-sewed the other velcroes by hand, because I couldn't figure out how to stick the large pocket-part (the part that holds the laptop... note to self: learn appropriate terminology for stuff) in the sewing machine without sewing the whole thing shut.


Here is where the stupid velcro showed me how stupid it was: because of the self-adhesiveness, every time I put the needle through the velcro the needle would adopt some stickiness. By the time I'd finished attaching the velcro, the needle was sticking to my fingers and the thread was sticking to the needle, which made the whole thing a very irritating, cumbersome process. STUPID VELCRO.


I persevered, however; no matter how annoyed I was, I didn't want to put this thing away unfinished AGAIN. So I finished all the velcroes, stuck my laptop inside, and shut the lid.


IT'S FINISHED! And not too bad looking, if I do say so myself. I can't believe I actually finished this. I expect applause and confetti.

Day Twenty Highlights: FINISHING MY LAPTOP BAG, and also the fabric - I'd forgotten how much I liked this fabric.

Day Twenty Lowlights: stupid self-adhesive velcro, sticky needles.

Tomorrow: I'm at a wedding for most of the day, so it might end up being something like my scarf.

Thursday, August 5, 2010

Day Nineteen: evil plan guide

I've been wanting to work on my "novel" for a while, since I experienced such success in Whistler... but my attempt for today was less than satisfactory. I think one of the reasons I did so well there is because I was thinking about it all the time, and working on it every day. (Plus, I was a little bit bored, so I was spending a lot of time with it.) I haven't thought about it in a while, and I wanted to take a stab at writing the beginning, but I'm not sure it's going so well. My idea was to start with three attempts of the main character to woo her intended love interest, all resulting in failure, which will be the catalyst for her turning into an evil villain to tries to steal the moon. I thought I'd write it out like a mission plan for a kind of prologue, detailing each failure, and then go in to chapter one. I think I need to practice more before I get it right, but this is my first attempt. (Remember to click the teeny tiny "Read More" if you want to read more.)

Wednesday, August 4, 2010

Day Eighteen: whiteboard

I was just about to type "Hey it's a real craft post finally" but then realized that it is not. It's not a new idea, but it is the completion of one of my unfinished projects. And, as I had to change into painting clothes and as I got paint all over my hands and the table, I think it qualifies as a legitimate craft day.

So, remember this? I was unhappy with the yellow border, since I am head over heels for damask and don't want any of this solid paper nonsense interfering with how beautiful it is. I'd mentioned going to Ikea to buy a new frame, but the whole point of making a whiteboard was that I didn't have to purchase one, thereby leaving my pocket lined with a little more coin. My brilliant idea was then to go to Value Village and buy a cheaper frame, hopefully one that was interesting-looking. I finally managed to get to Value Village today (I could have gone on Tuesday, but Tuesday is Senior's Day and I've learned to AVOID that location on Senior's Day), and almost bought a lovely, old-looking frame for $10, then realized that for that same price I could have just bought a whiteboard. So I settled for a different frame that was simple, but also only $5.

Here are they both side by side:


Materials:
- paints
- paint brush
- newspaper to lay down so you don't get paint on stuff
- old frame

My first step was to test a white board marker on the new frame to make sure it erased properly, and I was pleased to discover that because it's glass and not plastic (like the original attempt), the white board marker came off super easy. So, tip: use a glass frame.


Then I took out my paints and mixed colours together. When I began my painting career (hoping that I would be unexpectedly ridiculously awesome at painting -- SPOILER I was not), I only bought red, white, black, blue, and yellow. This is because during my practicum we had this fancy art lady come in to teach everyone how to do art, and she said that from those colours you can make any colour in the world, since they are the primary ones + lightener and darkener. (If you are going to do this, I will pass along to you the tip she passed along to me: make a LOT of the colour you end up using, because you will not be able to create it the same again if you run out.)


I started with blue and a bit of white, then a bit more white, then lots of white. Then I put the damask paper up to the frame and realized it was too blue, so I added two drops of yellow to make it greener. Then, since I love purple (even if it's secret purple), I added one drop of red. This is what I ended up with:


It looks a little gross from the picture, I realize now. Also, you may notice that I have a TON of paint. I had a lot left over, but I didn't want to run out because it took me so long to find the perfect colour. I painted the whole frame, and then came the hardest part of all for me - the waiting for it to dry part. I watched a tv show I had taped, ate watermelon, washed the paint off my hands (yes in that order, by accident), sat outside with my dog, windexed the glass part of the frame, and then the paint was dry! So I put it all together and voila:


I will include a close-up, because I really like how the colours worked out together.


When I put the back particle board on to close it all up, I discovered that it was an Ikea frame after all, only I paid $5 for it, with a picture inside! (The last time I used a frame that already had art in it for something else, a friend of mine commented, "I feel bad for the other art!" So do I, so I will try and find a use for the art that previously occupied this frame. It's not so bad, I guess.) Also, it's not one of the cheap-o Ikea frames I normally buy, since the clear part is glass not plastic, and the backing is particle board not cardboard. What a steal.

Day Eighteen Highlights: finishing an unfinished project, mixing paints, getting good stuff for cheap.

Day Eighteen Lowlights: not being unexpectedly ridiculously good at painting, getting paint on my mom's table... :(

Tomorrow: I promise I will take out the last unfinished project and TRY to work on it, but I can't promise I will finish it.

Tuesday, August 3, 2010

Day Seventeen: evil plan guide

Hey guys, guess what happened? I completely forgot about being creative until half an hour ago. I had a very busy day. I'm too sleepy to crochet, and it's way too late to drag out the sewing machine, so I am to work on my novel. No actual writing today (then what's the point???? I don't know. I forgot.), but I am researching about my tractor beam. It turns out that a LOT of people are interested in tractor beams to capture the moon. I'd be offended that I'm not creative except that the evil plan website gave that part of the plan to me.

This is what I have learned: tractor beams do not exist. MIT has created a teeny tiny one that moves nanoparticles around with light, which will probably eventually turn into an actual tractor beam that an actual villain will actually use to steal the actual moon, but for now it is not at that capability.

If the moon WAS stolen, or moved in any way, the results would be catastrophic: weather, waves, eventual collision with Earth.This is not exactly what I am going for, but I do have an idea about the actual moon-stealing. You may recall, this part of Greta's plan does not work - it KIND OF works, with strange consequences that I know but am not telling.

Something to look into: the magnetic field of the moon. I'm thinking some kind of giant magnet.

No highlights/lowlights, because I forgot about everything. Tomorrow: glove squirrel, I think. If I can find the gloves.

Monday, August 2, 2010

Day Sixteen: bookmarks

Confession: I really didn't want to work on the laptop bag today. I want it to be finished, and I want to be able to tell people that I made it, but I can't stand the sight of it right now. At a loss of what to do, I read my book for the majority of the day; usually I use whatever piece of paper is in the vicinity as a bookmark (receipts, post-its, other books), but today it happened that a left-over piece of my most favourite damask paper was the closest thing at hand. It inspired in me a brilliant idea: damask bookmark! Since I want to use that paper for every single thing until it's all gone, because I love it so much.

My initial plan was to chop off a bookmark-shaped piece and then slap some packing tape on it, but I thought you guys might call foul on that being an actual craft. So I endeavoured to make it more difficult for myself.

Materials:
- lovely paper, patterned and corresponding solid (HomeSense)
- ribbon that matches (Michaels)
- packing tape [or laminator, if you're so inclined, but I'm not sure if the ribbon would work in that case]
- glue
- scissors/paper cutter
- light cardboard (maybe that is what's known as "paperboard"?)

I decided to make two, since I had two matching solid/damask combinations. I estimated bookmark-size and cut all the paper to those imaginary dimensions - I probably should have used a ruler. Why don't I learn anything from all my mistakes.


Then I glued them together, more damask showing than solid colour. At this point, I ruined the pink one because I didn't use a ruler, so I cut it crooked, and then I didn't like how the paper looked together. I decided instead to make a plain damask bookmark with the pink paper.

Then I chose ribbons that looked nice, and glued them on with a stupid glue stick. I hate glue sticks for stuff like this. The funny thing is, I have wonderful liquid craft glue in my craft box - however I was in the dining room and the liquid glue was in my bedroom. Instead of walking over to retrieve the liquid glue, I angrily used the glue stick. Laziness, thy name is Laura.


Then I trimmed everything to make it uniform, and sealed it with packing tape. This was tricky work, but thankfully I didn't end up with any tape bunch-ups (except on the back, which doesn't matter anyway). Then I thought that perhaps they were too flimsy, so I cut up the cover of one of my scrapbook paper packages and taped it onto the back of each bookmark.


And now I have two beautiful bookmarks. They satisfy my need to make stuff like this - I find scrapbook pages too daunting; cards are the perfect size but I don't like giving them away after I spent all that time on then; these bookmarks I just made use the same principles as making a card except I get to keep it! Until I lose it. Which is why I made two.

Day Sixteen Highlights: brilliant ideas, damask paper, reading for half the day.

Day Sixteen Lowlights: glue sticks, laziness, spending hours making a card and then giving it away and then it ending up in the garbage.

Tomorrow: I'm going to SAY the laptop bag, but in all honesty it will probably not be the laptop bag. Maybe more novel, or a glove squirrel.